Secure IoT Access: Master SSH For Raspberry Pi & More
Are you wrestling with the complexities of managing your Internet of Things (IoT) devices from afar? The ability to securely access and control these devices remotely is no longer a luxury, but a fundamental necessity in today's interconnected world.
This comprehensive guide delves into the intricacies of establishing Secure Shell (SSH) access to your IoT devices, offering a practical roadmap for securing your systems and ensuring efficient management. We'll use the Raspberry Pi as a prime example, guiding you through the essential steps and considerations for implementation. This exploration moves beyond mere technical setup; it highlights how robust remote access contributes significantly to a secure IoT ecosystem. By the end of this article, you'll have a firm grasp of SSH's role in the IoT landscape and the skills to leverage it effectively for your unique projects.
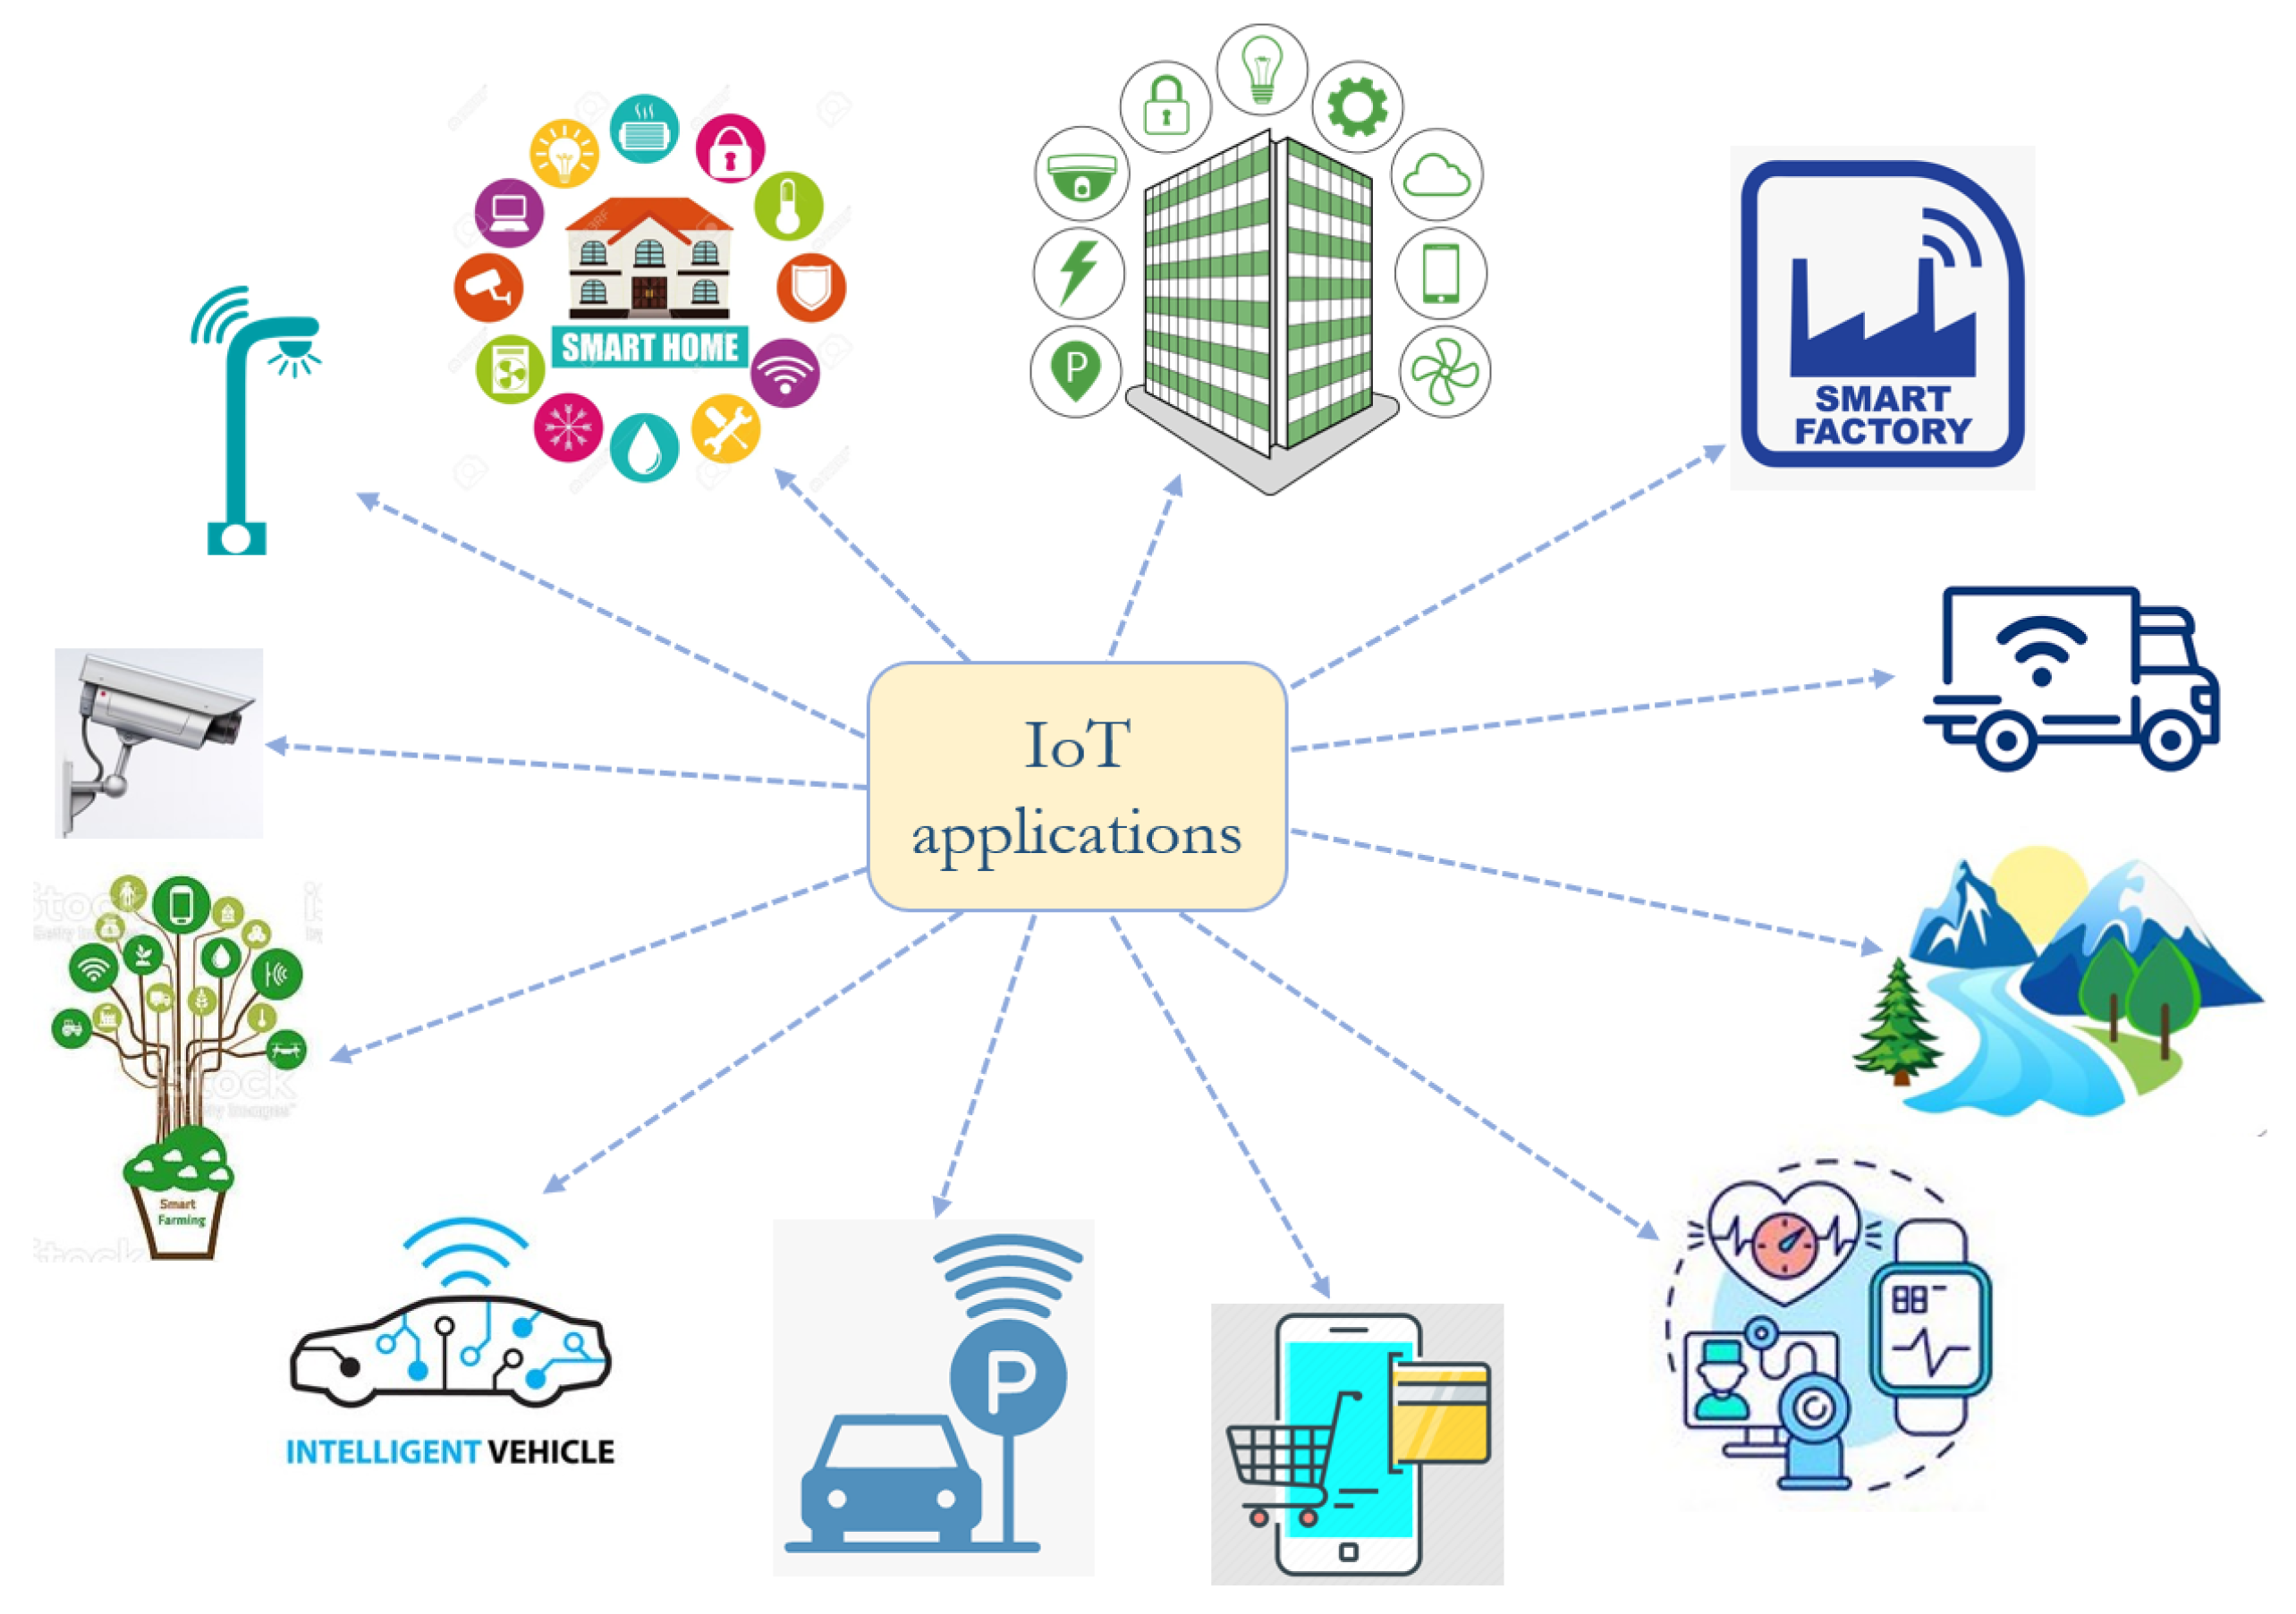
Before we dive deeper, consider the landscape. The IoT is not merely a technological trend; it's a transformative force reshaping industries and daily life. From smart homes to industrial automation, IoT devices are generating vast amounts of data and performing critical functions. This increasing reliance on these connected devices necessitates a proactive approach to their security and management. Remote access, when implemented correctly, is a crucial component of this approach.
- Peter Thiel The Contrarian Billionaires Controversial World
- Amy Shafer Where Is She From Her Amazing Journey
The core of this remote access strategy centers on Secure Shell (SSH). SSH is a cryptographic network protocol operating over a secure channel, making it an ideal method for accessing and controlling devices remotely. It offers a secure means to manage and troubleshoot devices from anywhere globally. Whether youre a hobbyist working on a personal project or a professional managing a fleet of industrial sensors, SSH offers the flexibility and security needed. It ensures data privacy and integrity during data transfers and remote command execution.
Implementing SSH on your IoT devices involves several key steps:
- Enabling SSH on the IoT Device: This is the foundational step. SSH must be enabled on the target device itself. This process typically involves modifying configuration settings on the device's operating system.
- Network Configuration: Ensure your device is connected to a network with internet access. The ability to reach the device over the network is vital for remote access.
- Port Forwarding (if applicable): If your device is behind a router or firewall, you might need to configure port forwarding to allow incoming SSH connections. This step directs traffic on a specific port (typically port 22) to your device. However, there are more secure methods, such as utilizing a VPN or a platform like SocketXP.
- Firewall Configuration: Configure the firewall to allow SSH traffic. This involves opening the SSH port in the firewall settings.
- Authentication: Employ robust authentication methods, such as key-based authentication, for enhanced security. This is far safer than relying on password-based logins.
Let's delve into the specifics of SSH implementations for IoT devices.
Secure Shell (SSH) provides a reliable and secure method to access and control IoT devices from anywhere in the world. The secure nature of SSH is paramount. It encrypts all data transmitted between your client and the IoT device, shielding it from eavesdropping and tampering. This ensures the confidentiality and integrity of your data, protecting your device from security threats.
A crucial aspect of security is controlling who has access to your devices. Restricting access to your IoT devices by whitelisting IP addresses is a prudent measure. This process involves specifying which IP addresses are permitted to connect to your device. The configuration means only authorized users from designated locations can access your device, significantly mitigating the risk of unauthorized entry.
While the basic principles of SSH remain consistent across different devices, the specific implementation can vary based on the hardware and software capabilities of the IoT device. Here are a few common approaches:
- Raspberry Pi: Raspberry Pi, being a popular single-board computer, readily supports SSH. The process typically involves enabling SSH through the Raspberry Pi's configuration settings, which often include enabling SSH in the system settings or using the `raspi-config` tool.
- Embedded Systems: Embedded systems, which may have limited resources, can still leverage SSH. You'll need to ensure the system has an SSH server installed and configured, often requiring careful selection of an SSH implementation that is optimized for the hardware's limitations.
- Commercial IoT Devices: Many commercial IoT devices come with SSH support pre-configured. The specific steps to enable and configure SSH depend on the device manufacturer and model. Check the device's documentation for instructions.
Azure IoT Hub Device Streams, for example, offers a secure mechanism for establishing SSH connections to devices. This integration demonstrates how cloud services enhance the security and ease of remote access for IoT deployments. The cloud platform manages the connection, offering authentication and encryption in transit.
When choosing an SSH implementation for your IoT device, several factors are crucial:
- Security: Choose an implementation that supports strong encryption and authentication methods.
- Resource Usage: The chosen implementation should not excessively drain the device's resources, as some IoT devices have limited processing power and memory.
- Compatibility: Ensure the SSH implementation is compatible with the device's operating system and hardware.
- Ease of Use: Select a solution that is relatively easy to set up and configure.
Different approaches have their own sets of advantages and disadvantages, and the best choice depends on your specific requirements and the resources available on your devices. For instance, a virtual private network (VPN) can be a secure way to remotely connect to IoT devices, particularly when these devices are behind a firewall or a private network. VPNs create an encrypted tunnel between the device and your access point, protecting data transmissions from interception.
In more professional or industrial settings where IoT devices may be handling sensitive data or where direct remote access is required, the use of VPNs becomes more important. They are often used to meet stringent security requirements.
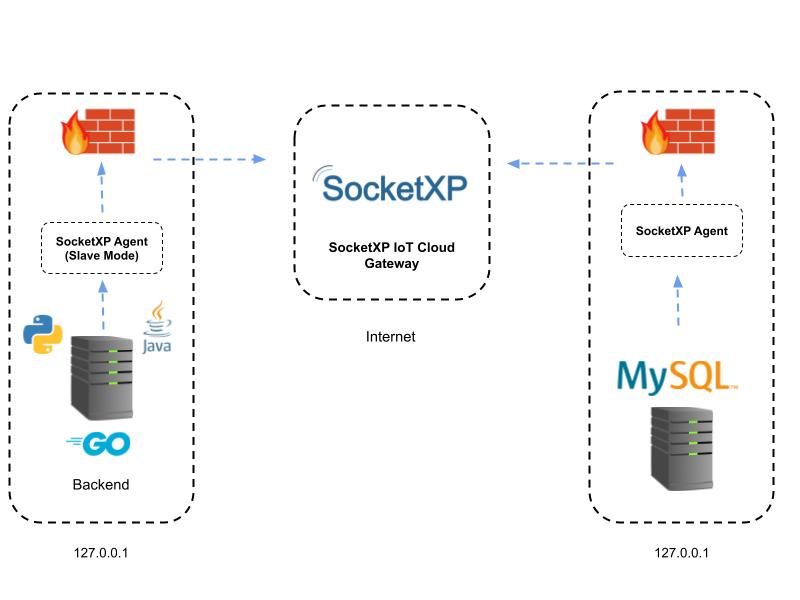
Another significant consideration is the utilization of platforms like SocketXP. Unlike many other solutions, SocketXP does not open device ports to the internet. It greatly reduces the risk of unauthorized access. This approach uses secure tunnels to provide remote access, minimizing the attack surface of your IoT devices. SocketXP's remote access and device management platform is ideal for a variety of applications.
Let's explore some common SSH implementations for IoT devices:
- OpenSSH: OpenSSH is a widely used, open-source implementation of the SSH protocol. It's highly secure and feature-rich. It supports a wide range of operating systems and is well-suited for devices with sufficient processing power and memory.
- Dropbear SSH: Dropbear is a lightweight SSH server and client designed for embedded systems and devices with limited resources. It's known for its small footprint and fast startup times. It's a suitable option for resource-constrained IoT devices.
- BusyBox SSH: BusyBox is a suite of utilities that provides lightweight versions of many Unix tools, including an SSH server. It's commonly found in embedded systems and is an easy choice for devices running minimal operating systems.
Securing your IoT devices is not a one-time task but a continuous process. You should regularly:
- Update the SSH server software.
- Use strong, unique passwords or key-based authentication.
- Monitor your devices for suspicious activity.
- Regularly review access logs to detect unauthorized access attempts.
The process can be broken down into the following steps:
- Configuration of the IoT device to accept SSH connections: This is setting up the device's SSH server. The configuration involves installing the SSH server (if not already installed), enabling it to start at boot, and configuring it to listen for incoming connections.
- Installing an SSH Client: Ensure that you have an SSH client on your local computer or the device from which you intend to remotely access the IoT device. Most operating systems come with SSH clients pre-installed.
- Initiating the SSH Connection: To establish the connection, open a terminal or command prompt and use the `ssh` command, followed by the username and the IP address or hostname of your IoT device.
- Authentication: You will then be prompted to authenticate. Use the username and password or, if key-based authentication is configured, select the appropriate key.
- Command Execution: Once successfully connected, you can execute commands on the remote IoT device, as if you were directly connected to it.
IoT device SSH example provides a practical way to achieve this by leveraging the secure shell (SSH) protocol. This enables you to manage and control the devices from remote locations, offering significant advantages in terms of maintenance, troubleshooting, and security.
- Melanie Hicks Hottest Xxx Scenes Videos Watch Now
- Fake Story The Tim Walz Horse Semen Rumor Explained Factcheck
How to Create Secure Reverse SSH Tunnel to IoT devices
SSH Remote IoT Example A Comprehensive Guide To Secure Device Management
SSH IoT Free Platform Examples Comprehensive Guide For Developers
